Bag Strap Adapter

Add an attachment point for a detachable bag strap.

Hidden nuts · Sliding keeper v11
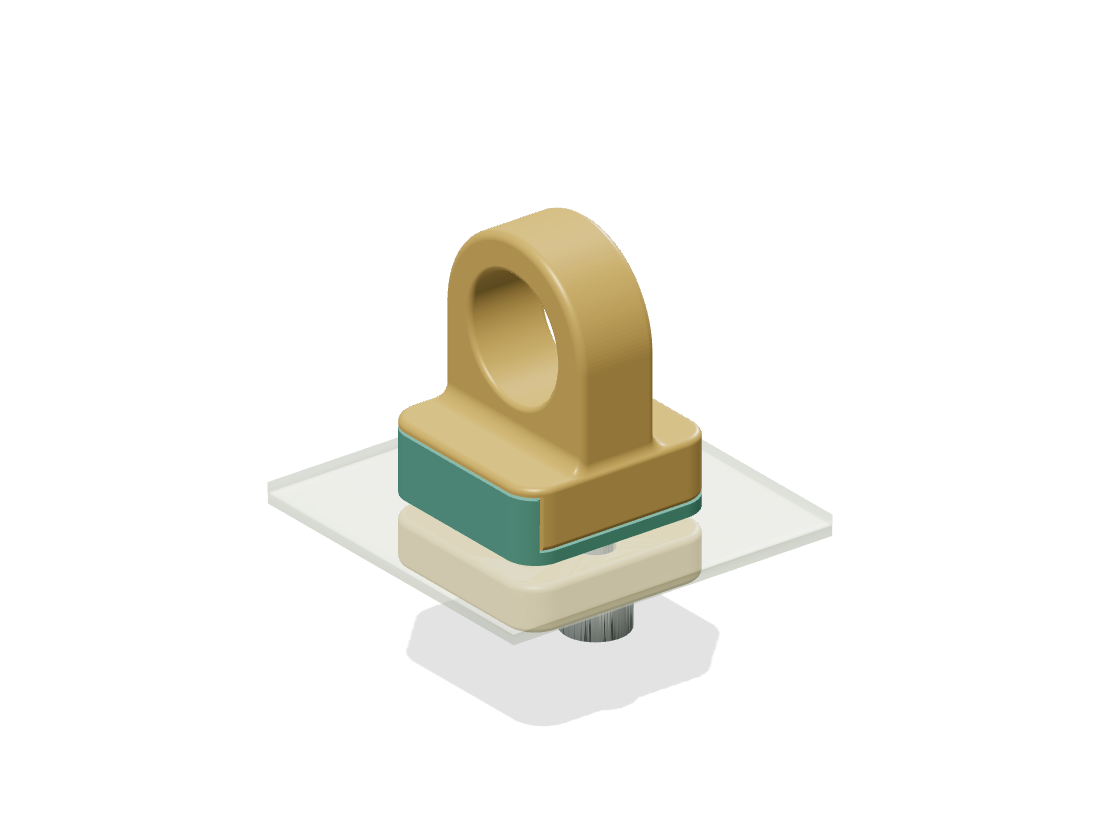
Bag Strap Adapter
Original parts · Schematic hardware and fabric
20 × 20 Mounting area / mm
Ø12 Hook opening / mm
M3 × 14 Non-countersunk screws
Model & validation

Configuration v11 uses v9 manufacturing geometry and is designed around approximately 2 mm bag fabric. Check fabric thickness, mounting clearance and hook dimensions before fitting it to another bag. Hardware, fabric and hook are schematic. No new load or durability tests have been performed.

Display colors distinguish parts. Geometry comes from the original project.

Explore next K969 Storage Stand ↗
Parts and complete instructions

Designed by Yue Xiaoliang · v11

Parts

Outer mount
The Ø12 opening accepts the hook. Solid shoulders support the nuts.
Sliding keeper
Slides in from the side to close the nut openings. Teal is only a display color.
Inner backing plate
Reuses the existing plate to clamp the fabric against the outer assembly.
M3 nut · 1 (illustrative)
Insert from the negative X side and align it with the screw hole.
M3 nut · 2 (illustrative)
Insert the second nut through the same side opening.
M3×14 screw · 1 (illustrative)
The heads stay inside the bag. Tighten the two screws alternately by hand.
M3×14 screw · 2 (illustrative)
Use ordinary non-countersunk M3×14 screws, with no added spacer.
Fabric schematic (illustrative)
Shows the nominal fabric clamping gap of about 2 mm.

Assemble

  1. Prepare the parts

    Prepare the outer mount, keeper, existing backing plate, two ordinary M3 nuts and two non-countersunk M3×14 screws.

    One side is shown. The bag needs one set on each side.

  2. Insert the nuts from the side

    Push both nuts through the side openings and align them with the screw holes.

    Do not force them in from the fabric side, hammer them in or heat-set them.

  3. Slide in the keeper

    Slide the keeper in from the same side until both holes align and the edge seats. Its fingers close the nut openings.

    It can still slide out before the screws are installed. Hold the assembly together.

  4. Align fabric and backing plate

    Keep the keeper outside the bag and the backing plate inside. Align them with the existing holes.

    First check the assembly without the bag, using M3×14 screws.

  5. Fasten from inside the bag

    Start both screws smoothly, then tighten them alternately by hand until the fabric no longer slips.

    The animation shows axial placement only, not threads or tightening torque.

  6. Check the connection

    Check the keeper, clamping plates and hook opening. Make sure the bag can still open fully.

    Use the actual hook to check insertion, gate closure and removal.

Disassemble

  1. Remove the strap and load

    Remove the strap and any load, then support the outer assembly.

    Do not disassemble while it is hanging under load.

  2. Undo both screws

    Unscrew both fasteners from inside the bag and withdraw them from the backing plate.

    Only the withdrawal direction is illustrated. Support the outside parts.

  3. Separate the plates and fabric

    Remove the inner backing plate and move the outer assembly away from the fabric.

    Separate along the existing holes without tearing the fabric.

  4. Slide the keeper out

    Withdraw the keeper horizontally through its original side opening.

    Do not bend the retaining fingers upward.

  5. Remove the nuts

    Take both nuts out through the same side to finish disassembly.

    Keep the small hardware together for reassembly.

undefined

  1. Find the strap attachment

    Clip the strap hook through the upper Ø12 opening and check that its gate closes.

    The wire loop only marks the attachment position; it is not a verified hook fit.

  2. Check the inside fastening

    The backing plate and two screw heads sit inside the bag. Check that they do not obstruct access to the contents.

    Use ordinary non-countersunk M3×14 screws. Do not force 20 mm screws into the blind holes.

  3. Check before use

    Check for fabric slip, hook insertion and removal, gate closure, and full opening of the bag.

    Increase test loads gradually under control. No new 1 kg or long-term durability tests are recorded.

Model and validation notes

Configuration v11 uses v9 manufacturing geometry and is designed around approximately 2 mm bag fabric. Check fabric thickness, mounting clearance and hook dimensions before fitting it to another bag. Hardware, fabric and hook are schematic. No new load or durability tests have been performed.